
How to assemble a fingerboard
Learn how to setup your professional wooden fingerboard.
Our wooden fingerboard completes are perfect for anyone, either beginners or professionals. They come with all the necessary parts to build it yourself and can be interchanged with other finger-boarding parts you may own.
What you will need
Setup your fingerboard
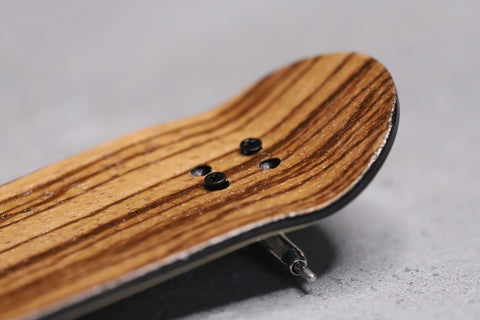
Step 1: Adding the screws
Step 2: Attaching the trucks
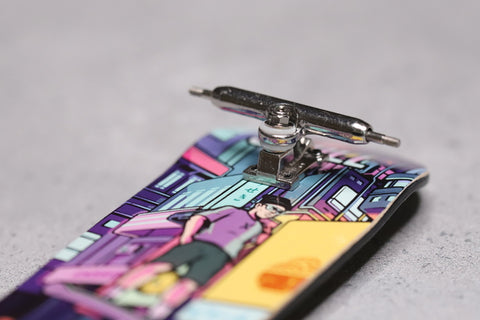
Once aligned, ensure the truck is flat against your deck and slowly tighten each one of the screws a bit at a time. Once the truck is attached to the deck, repeat to the process for the other truck. Note: If you tighten one screw all the way first, this will make your trucks misaligned and will make it harder to screw in the rest of your screws.
Different types of nuts:
- Nuts - Standard metal nuts
- Lock Nuts (Recommended) - Lock nuts have a nylon insert to stop loosening from fingerboard trucks
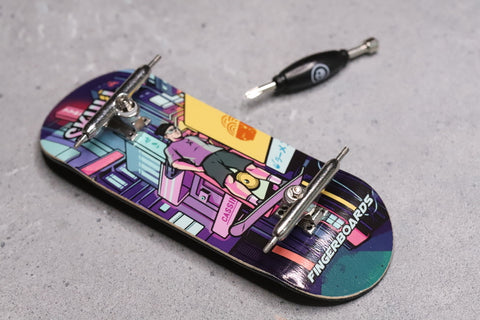
Step 3: Fitting the wheels
 If the truck has the nuts already attached, remove the nuts first. Attach one wheel onto each side of the truck and add the nuts back onto the end of the truck to secure the wheel in place.
  Note: Do not over-tighten the nut as this will cause the wheel not to spin properly and will impact on performance.
Step 4: Attaching the grip tape
Peel off the grip tape from the backing paper and stick it to the deck slowly, from top to bottom, to ensure there are no air bubbles. The grip tape should cover the entire deck.

Once applied, you will need to cut the grip tape so that it fits the shape of the deck. The grip tape is uncut, as this allows it to be fitted onto any deck size.
You can cut the grip tape using:
- Grip tape file (Recommended) - You can use a basic grip tape file or a premium grip tape file. Start by cutting around the grip tape to get most of the excess tape off. Then, file downwards to remove the remaining tape so that this will look neat and tidy. Continue this action around the full deck.
- Scissors - Cut around the grip tape until it fits the shape of the deck. This method will not be as seamless as using a grip tape file though.
Step 5: Personalising your setup
Once you have built your setup, you can personalise it and make it your own. There are a few ways to enhance the look and feel of your setup.
- Stickers - Attach stickers to the bottom of the deck, but be careful not to apply these near the truck, otherwise it will impact on performance.
- Cutting the grip tape - Some people choose to add cuts or slits into the grip tape to make cool designs, or to reveal some of the top ply. This is good if you have a coloured or engraved top ply as it shows off more of the deck.
- Board rails - Skull board rails give your fingerboard an added pop of colour, whilst protecting the graphic on your deck at the same time.